It was the ninth most downloaded app from the App Store in 2019 and the third most visited website in the entire world. The site’s average daily user time of 20 minutes makes it an effective marketing tool. Since its introduction in 2006, Facebook has given companies a simple way to connect with both current and new clients, so it should come as no surprise that there are over 90 million company pages on the social media platform.
Why Your Business Needs a Facebook Page
With one-third of the world’s population on Facebook, the platform should be an important part of any company’s marketing strategy. Using social media to promote your business is an effective way to connect with customers and build a following. Furthermore, when compared to other channels, Facebook can be used to promote your business at a low cost. Creating a Business Page is completely free, with the only cost being the use of Facebook’s advertising tool.
A Business Page allows you to communicate directly with people who are aware of your company and want to learn more about it, as well as potential customers. You can use photos, videos, and text to share information about your products, services, upcoming events, and more on your page.
Social media is also considered the new Search Engine Optimization (SEO), as Google reads social media websites for data in the same way that it does any other website. An active social media presence is required to gain more website authority (and thus increase your SEO).
Finally, when you start using a Business Page, you gain access to Facebook advertising, which we will go over in detail later.
Create and Optimise Your Business Page
The initial step is to create a Facebook Page for your company (not a profile). To create a page, you must first create a personal profile. Set up your Business Page by following the simple step-by-step instructions below. In order to maximise online presence and thus conversions, your Facebook Business Page must be properly optimised with SEO best practises.
Here are some pointers for optimising your Facebook Business Page:
Creating Your Page
Navigate to facebook.com/business and click the Create a Page button in the upper right-hand corner. Click Get Started after selecting Business or Brand. Write your company name, choose a category (such as bar, restaurant, etc.), and include your address and contact information.
Adding Profile and Cover Photos
Use images that are consistent with your brand and easily identify your company. Using your logo as your profile picture is a safe bet; however, keep in mind that your profile picture is cropped to a circle, so avoid putting anything in the image’s corners. Because the cover photo serves as a billboard for your company, use a high-quality image that captures the essence of your brand. On desktop, the cover photo is 820 x 312 pixels, and on mobile, it is 640 x 360 pixels.
Completing Your Profile
When your page is live, you can begin adding information about your company. Under the About tab, you can include a brief description, additional contact information such as a website link and email address, as well as other pertinent information. It is critical that you include your username in this step because it is how people will know where to find you on Facebook. To make it easier for people to remember your business name, use it or a clear variation of it. You should also include your business hours and double-check that the location is correct. Check that you have up-to-date information and that no sections have been skipped.
Set Your Call To Action Button
You can include a call to action beneath your cover banner. Choose the one that best suits your business; for example, if you own a restaurant, you will most likely want customers to Book Now or Contact Us.
Arranging Your Page Tabs
To rearrange and toggle certain tabs on and off, go to settings and select edit page. Some tabs will be more relevant to your page than others, so you can order them in the order you want customers to see them.
How To Add An Administrator To Your Facebook Business Page
The roles on your Facebook business page change as your company grows. A Facebook business page administrator may need to be added or changed.
Only current administrators of a Facebook page have the ability to delegate roles, and they can set limited or unlimited capabilities.
Facebook business pages have five different page roles:
Admin
An admin can manage all aspects of the page, including sending messages and posting as the page, creating advertisements, seeing which admin created a post or comment, viewing insights, and assigning page roles.
Editor
An editor can make changes to the page, send messages and posts as the page, make advertisements, see which admin made a post or comment, and view insights.
Moderator
A moderator has the ability to respond to and delete comments on the page, send messages as the page, see which admin created a post or comment, create advertisements, and view insights.
Advertiser
An advertiser can see which admin created a post or comment, create adverts and view insights.
Analyst
An analyst can see which admin created a post or comment and view insights.
Adding Roles On A Facebook Page
It is simple to add a new administrator to a Facebook business page.
The new administrator has the ability to change or remove roles. This is one method for changing the administrator of a page completely.
An ‘Editor’ or anyone with lesser capabilities can’t delete the admins.
Things to consider before appointing an administrator:
1.Only the admin of a page can assign roles to Facebook users who LIKE the page.
2. They are usually added using their Facebook username, so knowing what the person’s profile picture is useful.
3. If the user does not appear in the ‘add list,’ enter their login email address instead.
4. The new position must be accepted via invitation (see images how to set up below). A notification from Facebook will notify the user of their new post.
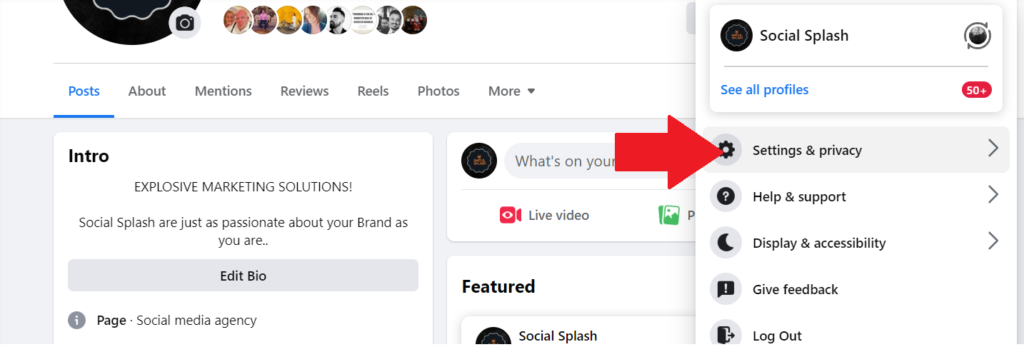
First Tap Your Profile Picture (Top Right of the Screen) Then Choose Settings & Privacy
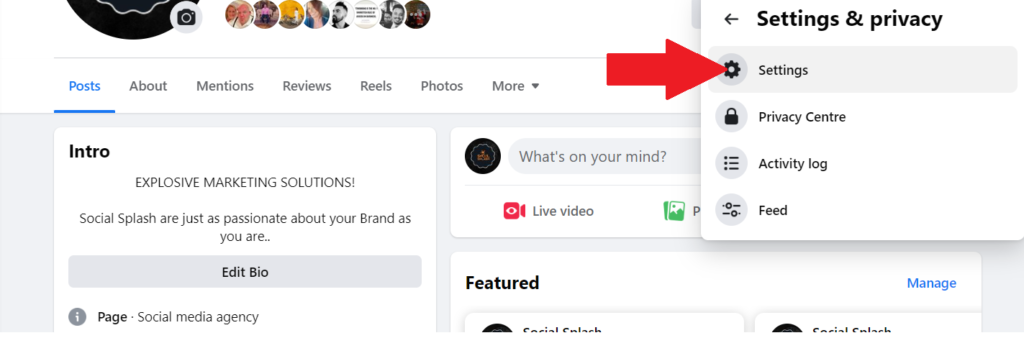
Then Click The Settings Tab
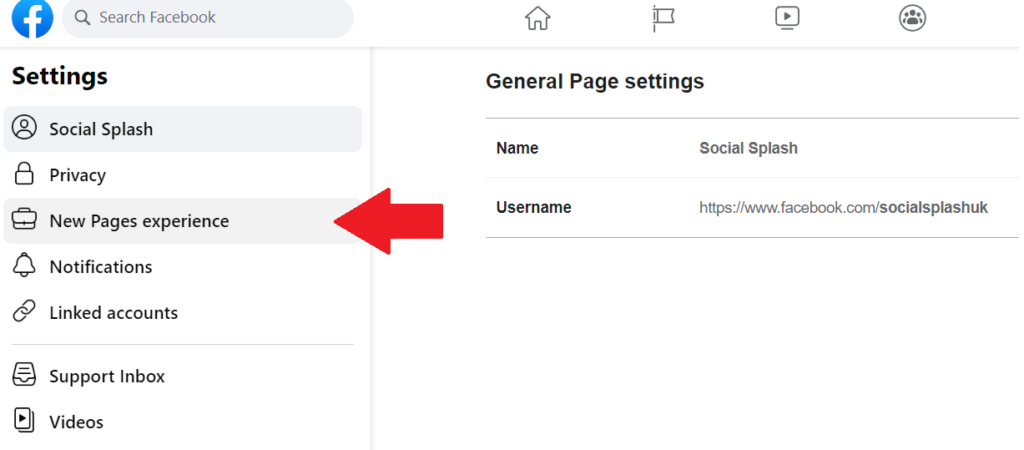
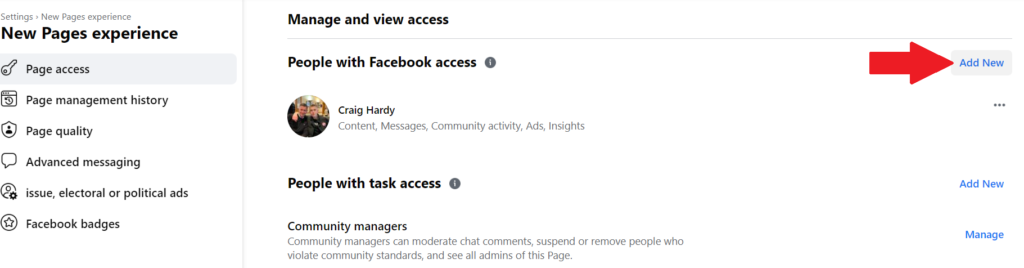
Choose The ‘New Pages Experience’ Tab
Click The Add New Button
Search & Add New User
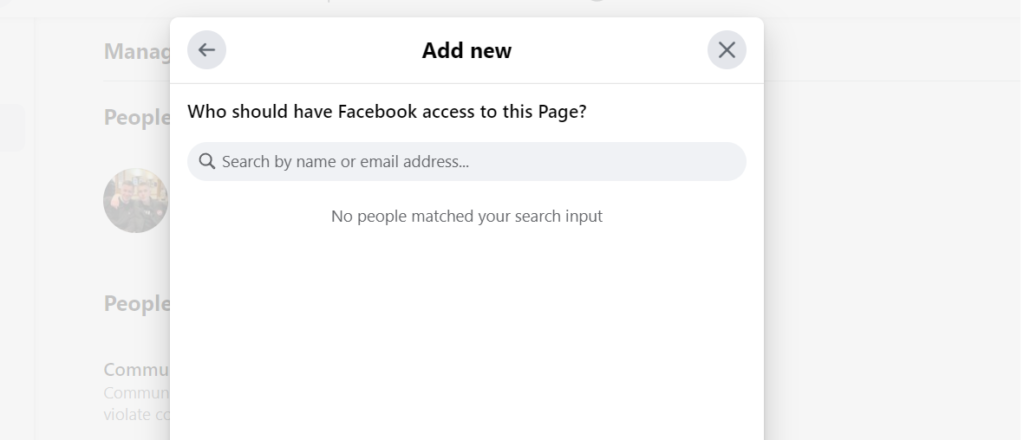
Once you’ve selected the person you want to add, you then select from one of the 5 roles (as we discussed above).
This will determine their access / actions on your Facebook Page.
For more help and support with Social Media Management, please visit us at www.socialsplash.co.uk
